Shopify is the best tool where you can create a high-quality eCommerce Store.
When you decide to build an online shop or eCommerce site, there are many things to take into consideration. The most important aspect is that which eCommerce platform you select for the online store. Because many platforms offer different free and premium themes or templates, but Shopify is the best platform that you can use without any problem.
Shopify is a very accessible platform that everybody quickly understands without the modern knowledge of development. Other than that, I believe Shopify offers the most customizable theme even as being competitively priced. The admin panel also provides the easiest navigation and use.
Let’s have a look how to build an online store with Shopify
Step 1- Sign Up

Go to Shopify.com and click on the Get Started button after punch the email address. Shopify suggests a 14-day trial so you can play around with the tools and see if it is right for your online shop. It will also ask you, your name, and password along with your email address and it is changeable. Next click on the ‘create your store’ button and move on.

After few mints of system’s process, you can select whether you would like to sell online, select the online store click on the next button.

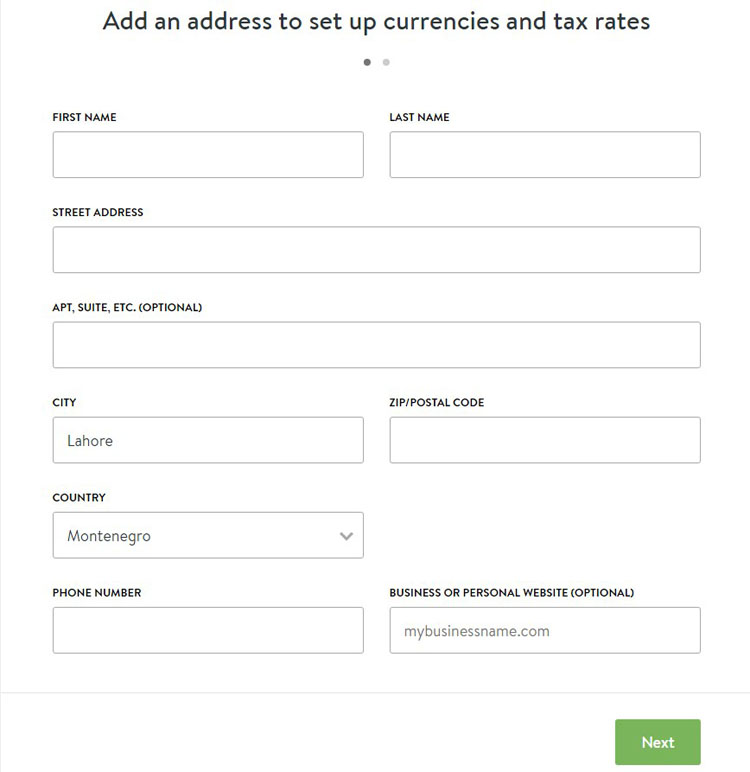
Fill this page along with your full name, address, and contact information; all this information configure your tax rates and currencies. Click next for next page.
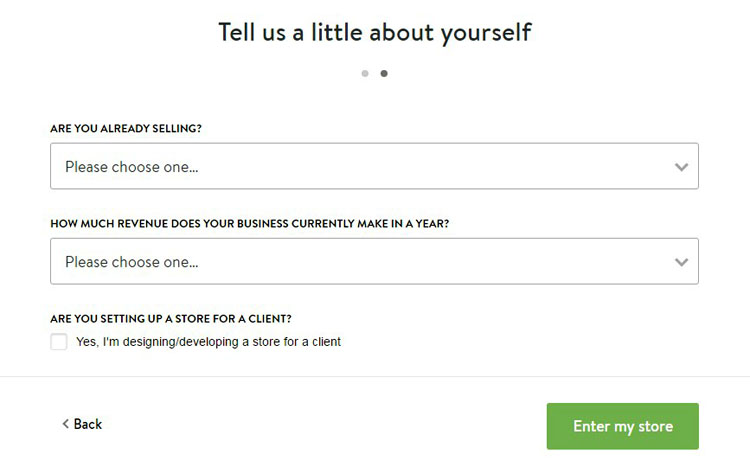
On this page, Shopify asks you the detail of your business. It collects this information just for customer help and improves the system in the future. Add the right and full information how long you have been selling, how much you plan on making with the store.

If you are suing this to make a store for one of your clients click the button. After the completion of the form click the ‘Enter my store’ button for further proceeding.
Step 2- Launching Your Store
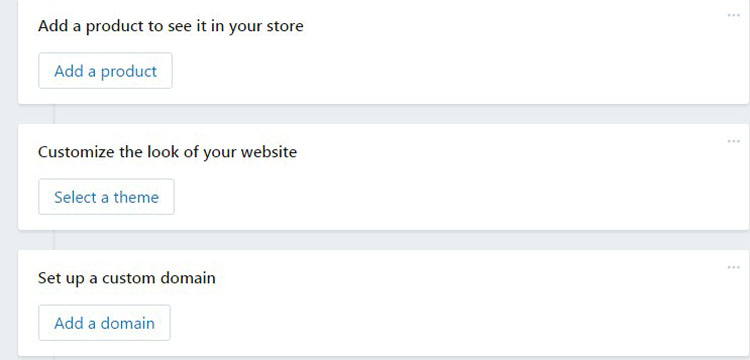
In second phase Shopify moves to the backend of the dashboard, which is similar to WordPress look. There are three steps to get started selling online. Click on the add product button fill it with the title, description, type and vendor according to your first product.
Here you can insert the full description of your product and buyers meet with your products through this.

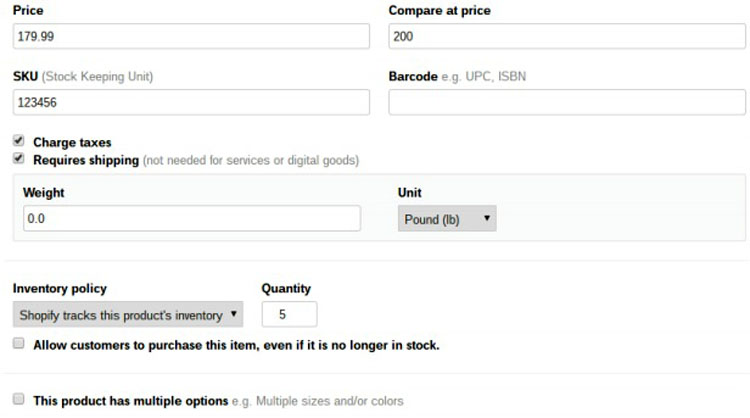
Further, fill the price and comparison price if needed, SKU number, tax info and more. You can fill inventory policy if you have a limited amount of product. Check the button if your product has multiple options and you can change up things like sizes and colors.
Next, you upload the picture of your product and specify if you want to add it to a collection and include any tags that help the people of color, size, and name.
Now you modify the SEO and visibility according to your product. You can use the default SEO and also write the product description in your word. Tell the system you update the product for the world. Then click save the product.

When you save your product, then go back to the dashboard and click on the Edit button theme to customize the look of your online store or website.
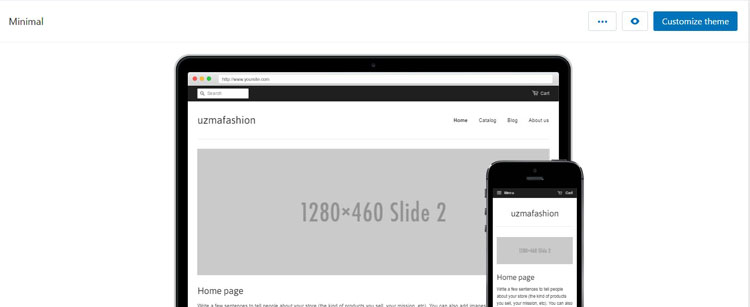
Shopify theme is entirely customization, so it is really up to you how much you customize it or change to design the storefront and make it look as you want. At the starting, you upload an image for your logo and change the color of the site similar to the logo.
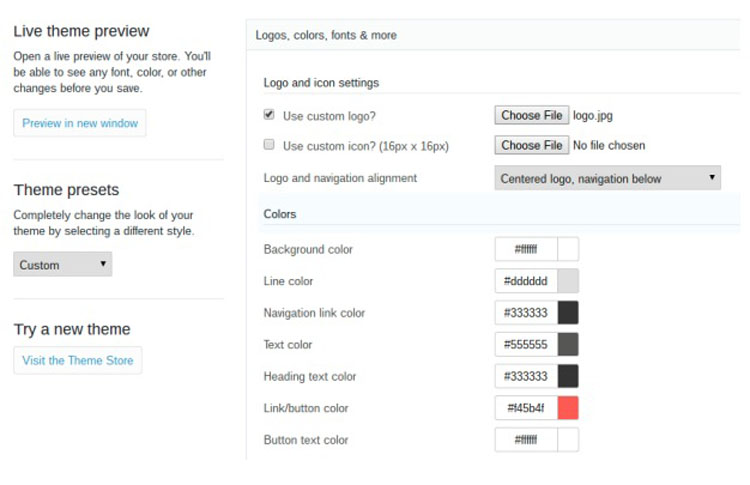
After that, you click on other tabs to modify the appearances of things like the homepage, footer, product pages and checkout.
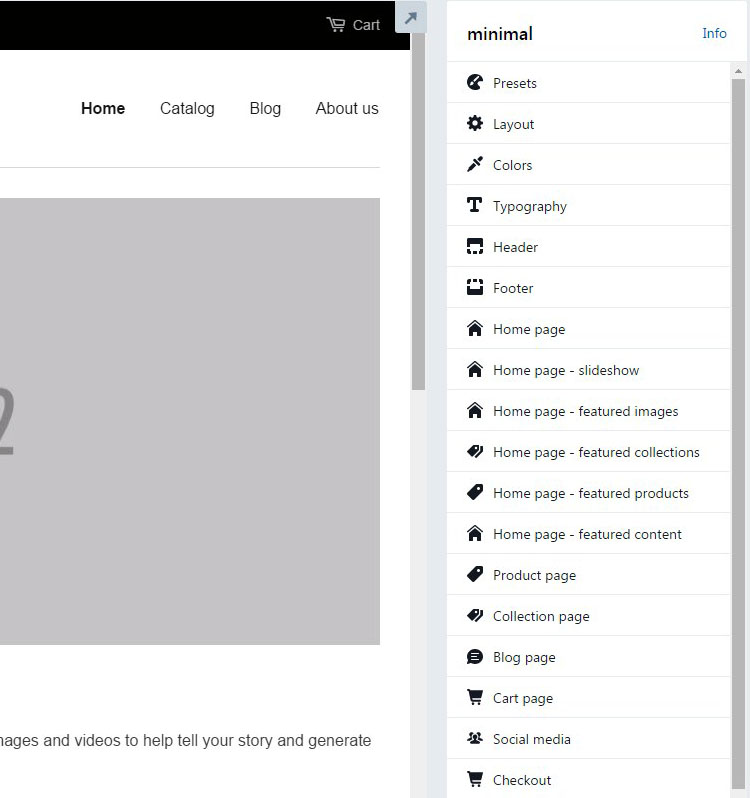
Freely play around with this setting and click on Preview in New Window link to see the look of the site.
You click on the Visit the Theme Store link to take hold of a free or premium theme this is totally for you. After the completion of this editing, you click on the ‘Publish changes’ button and take a return to the dashboard.
Your online site will be finalized where you must procure or transfer a domain to make the site official. After that click on ‘AdDomain’ button to get started.

Select the domain name that you want to register. This is a part of the process where you can whip out your credit card. If you will have already domain name, just add the domain name and click on the Add Domain.
When you did this process, go back to the dashboard and select a plan through Shopify.

Step 3- Manage your Payment Processing
Your online eCommerce store setup is done, and you have an online store, but you still have to understand the payment process. For this system, you click on the Payments tab of the dashboard. The evasion payment processing option is called Shopify Payments. After that click on ‘Complete Shopify Payments Account Setup’ to organize setting like your SSN, how many orders you plan on having and your bank account information for receiving payments.
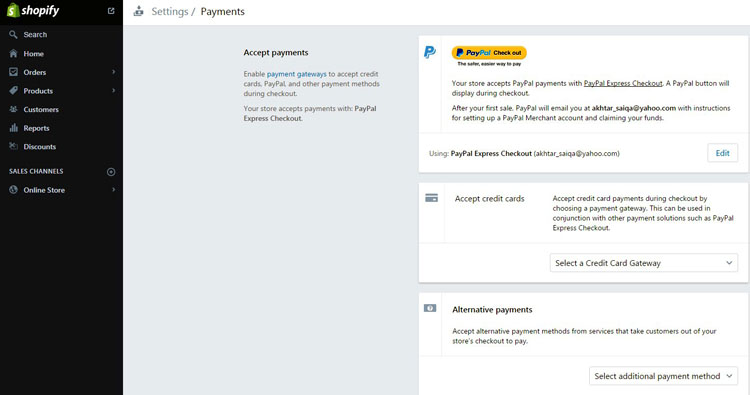
Where, you can also see the other way of payment like BitPay, GoCoin, and PayPal. All these payment ways are good, and most people use them. But Shopify personally offers a good way of payment so you can select this because it is good.
More Than 15 Minutes
Many things that you can do with Shopify online store after you launch or done. But that would take more than 15 minutes. You can select the checkout apps in Shopify App Store and include it in your store. Feel free to read thoroughly the Shopify documentation page to appreciate all the amusing little tabs in your Shopify control panel. You can also contact with the Shopify team 24/7 through email if needed, now you have done an online Shopify store.
Conclusion
Let’s face and discuss on Shopify online store. If you have any question how to build an online store in the comment box. The process to make an online store is very simple. It is not software that you have to set in motion or install.
In theory, you can have a great looking. It is fully functioning and unique store in very short time without the entire developer. With this way, you can spend more time on marketing and your product rather than having to preserve the site also have a good sale.

